OneTivi.com — Drawing can feel intimidating at first, but learning how to draw step by step transforms overwhelming subjects into simple, manageable tasks. Whether you’re sketching basic shapes or crafting detailed portraits, following a structured process helps you build confidence and competence quickly.
In this guide, you’ll discover clear, actionable tips that show how to draw step by step from your very first light lines to the finishing touches that make your artwork pop.
(toc)
Getting Started with How to Draw Step by Step
Every successful drawing begins with preparation. Before you pick up your pencil, take time to gather your materials and establish your workspace for comfortable, uninterrupted practice. Consistency is key: set aside a dedicated sketchbook and pencil set to monitor your progress over time.
Basic Tools and Warm-Ups
Warming up isn’t just for athletes. Light sketching exercises improve hand–eye coordination and loosen stiff fingers:
- Draw straight, curved, and zigzag lines across the page to practice control.
- Sketch circles, ovals, and free-form shapes to establish fluidity.
- Spend 5–10 minutes on each exercise before moving to your subject.
Breaking Down Shapes
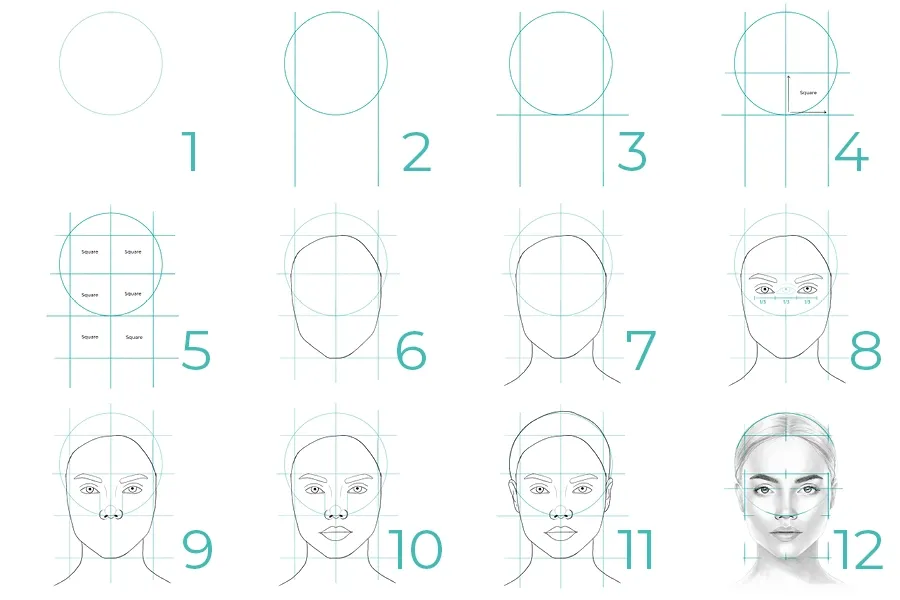
Understanding how to draw step by step means recognizing that complex objects break down into basic shapes:
Start by identifying the geometric forms—circles, squares, triangles—that make up your subject. Light, loose lines let you adjust proportions without fear of mistakes:
- Outline the general form using light pencil strokes.
- Measure distances by comparing the width and height of shapes.
Refining Details and Lines
Once your framework is set, it’s time to refine:
Start applying solid lines to define edges and contours. Gradually erase unnecessary guidelines, sharpening your focus on key details:
- Darken primary outlines to emphasize the subject’s silhouette.
- Add interior details—folds, creases, or patterns—to bring depth.
- Continuously flip your drawing or view it in a mirror to spot proportion issues.
Adding Shading and Texture
Shading brings drawings to life by simulating light and shadow. Follow these steps step by step:
- Determine your light source location.
- Use hatching, cross-hatching, and stippling to build tonal values.
- Smooth gradients by blending with a tortillon or soft tissue.
Practice Strategies and Expert Tips
Before you dive into endless sketching, consider smart practice from seasoned instructors:
- Deliberate practice: Focus on challenging elements, like perspective or anatomy
- Use reference images to understand angles and proportions.
- Join drawing communities or classes for feedback and motivation.
Conclusion
By following these clear stages—warm-ups, shape breakdowns, line refinement, shading, and targeted practice—you’ve learned how to draw step by step in an engaging and stress-free way.
Now it’s your turn: grab your sketchbook, apply these techniques, and share your progress in the comments below. Let’s draw together and grow as artists—start sketching today!
Frequently Asked Questions (FAQs)
1. What basic tools do I need to start drawing?
At minimum, you’ll want a quality pencil, eraser, sharpener, and sketchbook; for smoother blending, add a blending stump and kneaded eraser to your kit.
2. How often should I practice to see real improvement?
Aim for 15–30 minutes daily—short, consistent sessions help build muscle memory and progress faster than infrequent, longer workouts.
3. Can I learn “how to draw step by step” digitally?
Absolutely—apps like Procreate or VR tools such as Meta Quest’s Pencil – Learn to Draw! offer guided, step-by-step lessons and real-time overlays.
4. How do I choose good reference images?
Pick high-resolution photos with clear lighting and distinct forms; free libraries like those featured in Easy Drawing Guides help you practice on everything from animals to everyday objects.
5. What common mistakes should beginners avoid?
One big pitfall is diving into details too soon—always build a solid foundation of shapes and proportions first to prevent structural issues later.


